Film Still Photography
  • Home
  • About
  • Blog
  • Vintage Cameras
    • Argus 75
    • Brownie Flash II
    • Contax G2
    • Ensign Selfix 820
    • FED-1 (PE0320)
    • Graflex Crown Graphic
    • Ihagee Exa
    • Leica M6
    • Nikon S2
    • Nikon F
    • Nikon F2
    • Nikon F3
    • Nikon FA
    • Olympus OM-1
    • Olympus OM-2 SPOT
    • Olympus Stylus
    • Pentacon Six
    • Pentax Spotmatic IIa
    • Rollei 35
    • Voigtlander 15mm ver III
    • Yashica C
    • Zeiss Ikon Nettar 515/2
  • Learning Composition
    • The Monochrome Diaries
    • Single & Multi Elements
    • Symmetry
    • Keep the Right Strong
    • Framing
    • Color in Composition
    • Deep Dive Bubble Man
    • Photo Assignments
  • Darkroom Lessons
    • Building a Sink
    • Air Ventilation
    • Analyser Pro
    • Development Hints
    • Primer for Film Photography
    • Bulk Loading Film
    • Pushing & Pulling Film
    • Color Development
    • Digital Contact Sheets
    • Stick to One Film Stock?
    • HP5+ Shot at 200 ISO
    • HP5 Shot at 1600 ISO
    • HP5 Shot at 3200 ISO
    • Medium Format
    • Washing Film
    • Split Grade Printing
    • Using Distilled Water in Film Development
    • Darkroom Paper
    • Foma100 EI 400
  • Photography Books & Films
    • Colin O'Brien
    • Lartigue Life in Color
    • Magnum Contact Sheets
    • Top Photography Movies
    • William Eggleston's Guide
    • Helen Levitt
    • Sally Mann Immediate Family
    • Saul Leiter Early B&W
    • Leica 100 yrs
    • Calendar Days of Asaya Hamaya
    • The Decisive Moment
    • Regarding Women
    • Robert Capa in Love and War
  • Single Image Deep Dive
    • Sergio Larrain "A Man After Dark"
    • Colin O'Brien 'Comings & Goings"
    • Erwitt Mother & Child
    • Man Running
    • Samuel Becket
    • Koudelka Wristwatch
    • Dovima with Elephants
Salzburg, Austria

"No place is boring if you've had a good night's sleep and a pocket full of film." - Robert Adams
​
"Tea first, then photography..." - Philip Lee Harvey

From an Article written by Philip Lee Harvey
Split Grade Printing

1/13/2018

0 Comments

 
Picture
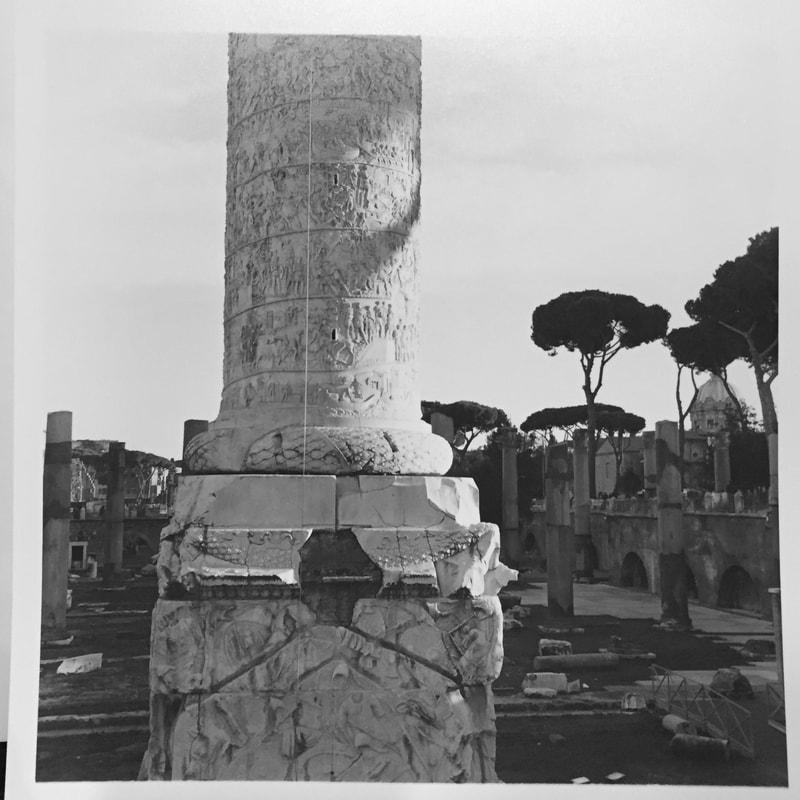
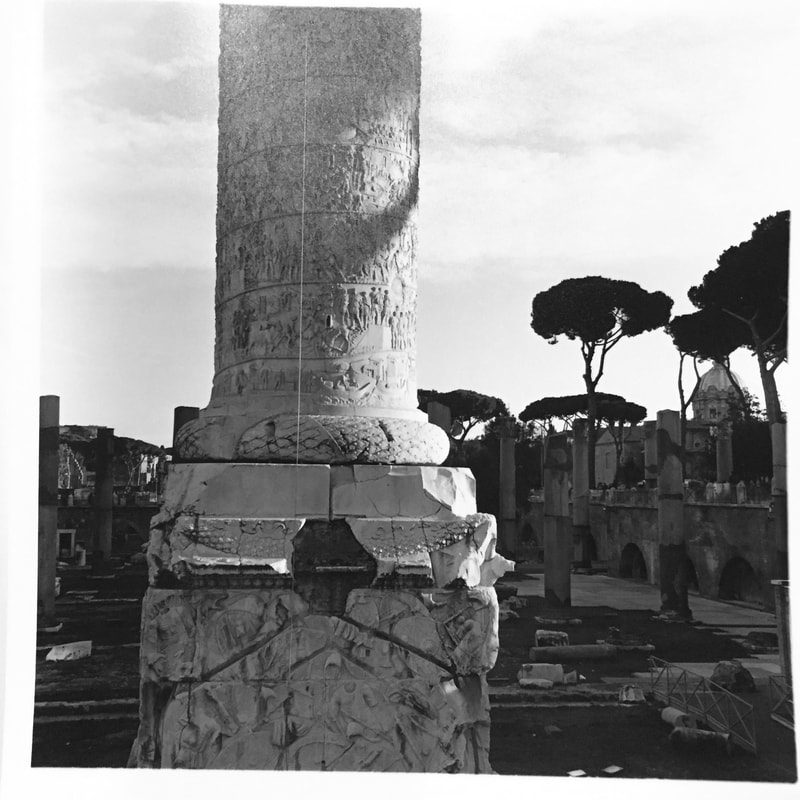
The picture above was shot on my iPhone of a print I made this weekend.  The image above is how I had seen the image and it is how I pictured the final print looking.  To be clear the line in the middle of the column was actually there and is not a scratch on the negative!

The problem I encountered was that the negative has a massive dynamic range which gave me way too much contrast.  I needed to mute the blacks but still give punch to the highlights and mid tones.  I needed to do some split grade printing!

Fortunately for me, one of my favorite YouTubers just happened to have a video on how to split grade print (linked below) which walked me through the process.  I thought I would show my own experiences through it.
Picture
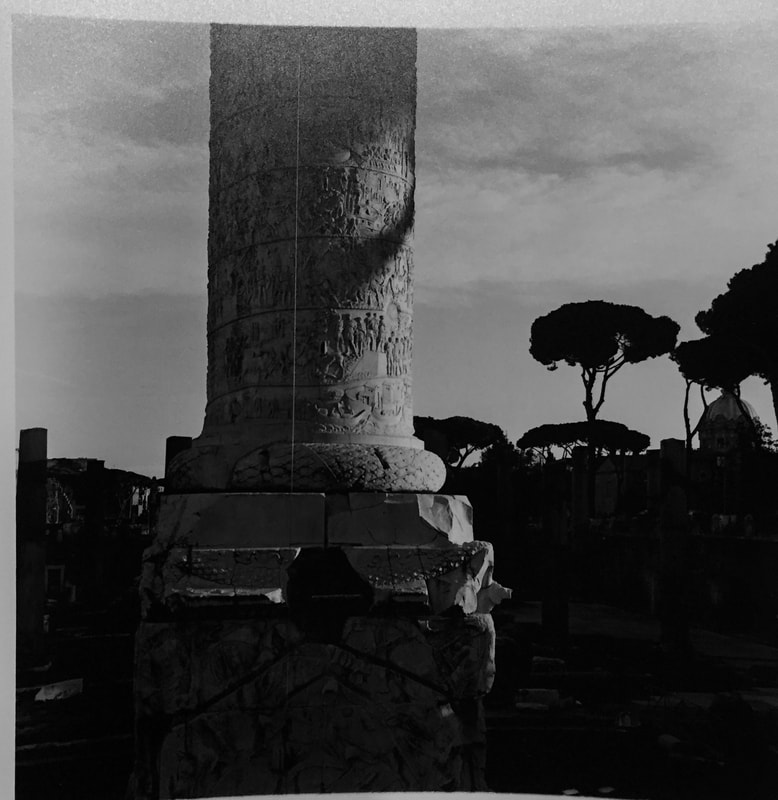
The picture above is the first print I made (after the test strips of course).  I determined that I needed 10 seconds to display the sky and give sufficient weight to the highlights. But it rendered everything very dark. Now I could opt to do some dodging and burning, but this would have been very difficult and taken ages.  I could have exposed for less time, but the print would have been too soft.  
Picture
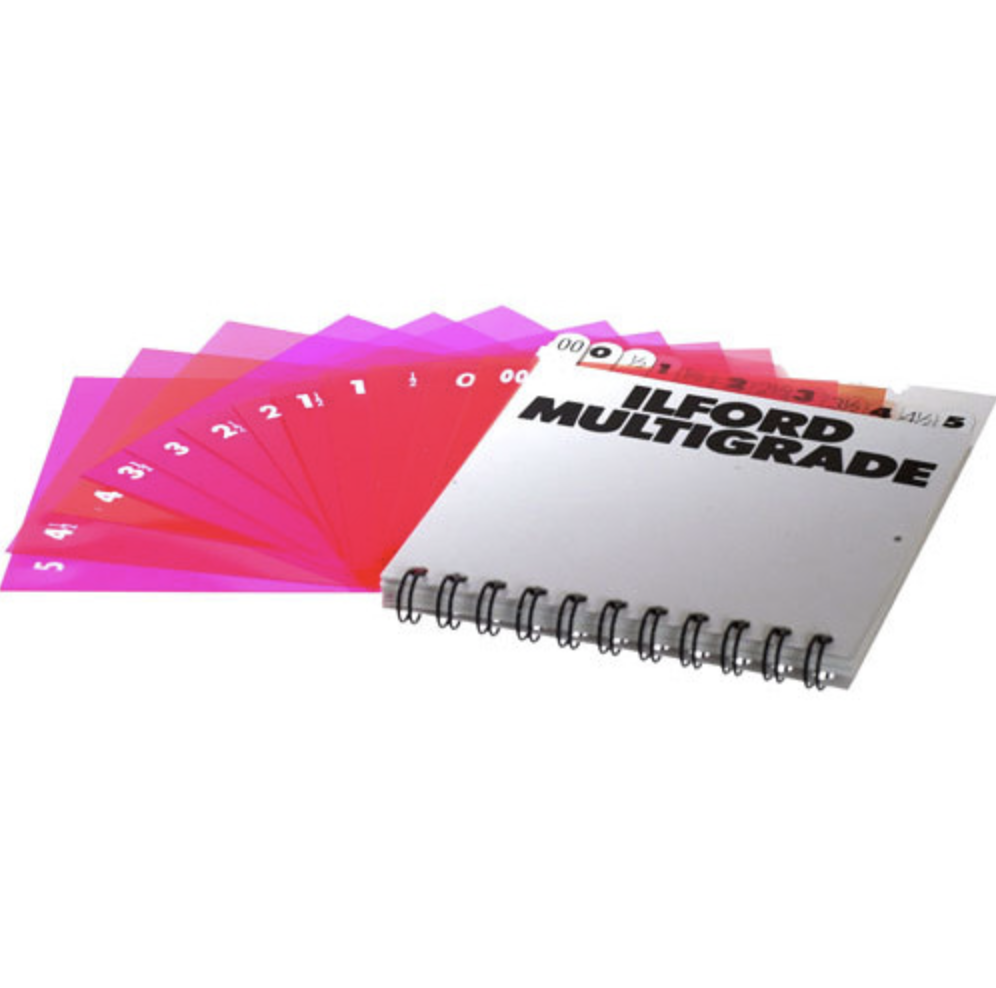
Ilford has multigrade paper which is designed to work with their filter system.  Here you use the filter before the negative (they have different style filters for above and below the negative but they work the same way) which allows you to control contrast of your image. 

Now I typically use these to add some punch to a print or to soften it a bit. Most of my work only requires the use of a single filter making it nice and easy.  So I began trying only one, softer filter.
Picture
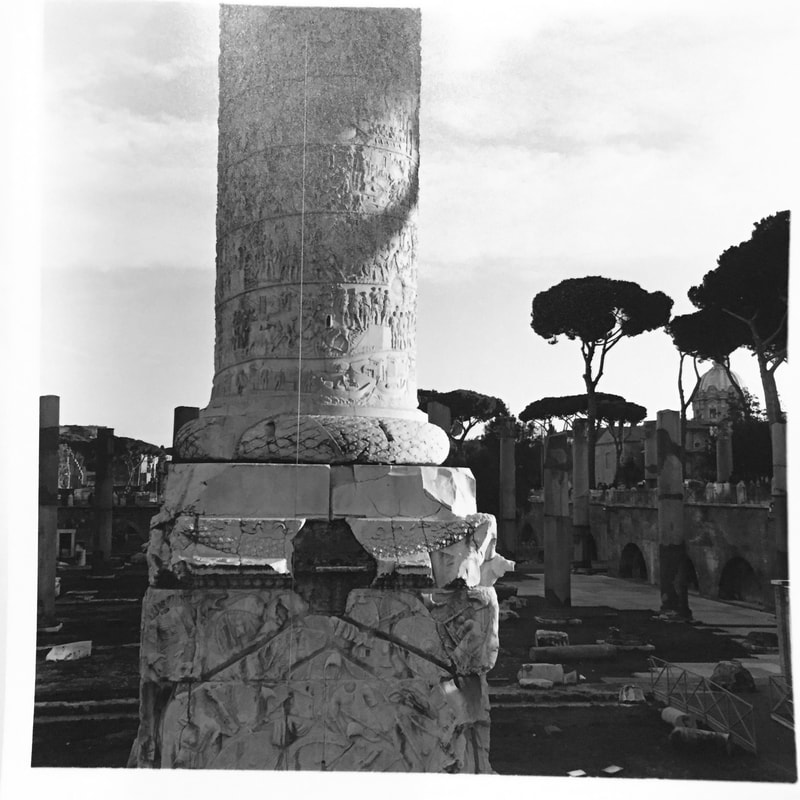
In the image above I only used a 0 filter to soften the contrast down.  I used this at 15 seconds (a full 5 seconds more than the very dark print above) and now I have all the detail that I want in the trees and lower portion of the image.  My issue is that I lacked a bit of the punch I needed in the middle tones and highlights.  

So I decided to add a 3 filter after laying the 15 seconds of 0 filter.  So I put a new sheet and ran 15 seconds under 0 filter, and without moving the negative or the paper, I changed the filter to a 3 filter for 5 seconds.
Picture
This gives me the cloud punch I wanted, a bit more contrast to the column but keeps the blacks under control.  

While the iPhone images are not perfect, I hope you can see what I was after.  The final prints came out very nicely.  I made a few copies of the image to add a bit of vignetting and a bit more time on the clouds and was done. 

A new skill learned, tried and now I will open a bottle of wine and enjoy the print.
I would like to give a special shout out to "Shoot Film Like a Boss" for the very informative video.  I have been watching his videos for the past few months and really love what he puts out.  I highly recommend his channel!
0 Comments


Leave a Reply.

    Author

    Patrick...confirmed film & digital photography addict.

    Archives

    March 2023
    January 2023
    March 2022
    January 2022
    December 2021
    November 2021
    October 2020
    August 2020
    June 2020
    May 2020
    April 2020
    December 2019
    November 2019
    October 2019
    September 2019
    August 2019
    June 2019
    May 2019
    April 2019
    March 2019
    October 2018
    September 2018
    August 2018
    July 2018
    June 2018
    May 2018
    April 2018
    March 2018
    February 2018
    January 2018
    December 2017
    November 2017
    October 2017
    September 2017
    August 2017
    July 2017
    June 2017
    May 2017
    April 2017
    March 2017
    February 2017
    January 2017
    December 2016
    November 2016
    October 2016
    September 2016
    August 2016

    Categories

    All

    RSS Feed

Powered by Create your own unique website with customizable templates.
Photos used under Creative Commons from left-hand, Ant Jackson, Skley, mikecogh, Helen.Yang, TheeErin, Dean Hochman, CJS*64, DaveR1988, FootMassagez, Loco Steve, dmytrok, Christiaan Colen
  • Home
  • About
  • Blog
  • Vintage Cameras
    • Argus 75
    • Brownie Flash II
    • Contax G2
    • Ensign Selfix 820
    • FED-1 (PE0320)
    • Graflex Crown Graphic
    • Ihagee Exa
    • Leica M6
    • Nikon S2
    • Nikon F
    • Nikon F2
    • Nikon F3
    • Nikon FA
    • Olympus OM-1
    • Olympus OM-2 SPOT
    • Olympus Stylus
    • Pentacon Six
    • Pentax Spotmatic IIa
    • Rollei 35
    • Voigtlander 15mm ver III
    • Yashica C
    • Zeiss Ikon Nettar 515/2
  • Learning Composition
    • The Monochrome Diaries
    • Single & Multi Elements
    • Symmetry
    • Keep the Right Strong
    • Framing
    • Color in Composition
    • Deep Dive Bubble Man
    • Photo Assignments
  • Darkroom Lessons
    • Building a Sink
    • Air Ventilation
    • Analyser Pro
    • Development Hints
    • Primer for Film Photography
    • Bulk Loading Film
    • Pushing & Pulling Film
    • Color Development
    • Digital Contact Sheets
    • Stick to One Film Stock?
    • HP5+ Shot at 200 ISO
    • HP5 Shot at 1600 ISO
    • HP5 Shot at 3200 ISO
    • Medium Format
    • Washing Film
    • Split Grade Printing
    • Using Distilled Water in Film Development
    • Darkroom Paper
    • Foma100 EI 400
  • Photography Books & Films
    • Colin O'Brien
    • Lartigue Life in Color
    • Magnum Contact Sheets
    • Top Photography Movies
    • William Eggleston's Guide
    • Helen Levitt
    • Sally Mann Immediate Family
    • Saul Leiter Early B&W
    • Leica 100 yrs
    • Calendar Days of Asaya Hamaya
    • The Decisive Moment
    • Regarding Women
    • Robert Capa in Love and War
  • Single Image Deep Dive
    • Sergio Larrain "A Man After Dark"
    • Colin O'Brien 'Comings & Goings"
    • Erwitt Mother & Child
    • Man Running
    • Samuel Becket
    • Koudelka Wristwatch
    • Dovima with Elephants