Film Still Photography
  • Home
  • About
  • Blog
  • Vintage Cameras
    • Argus 75
    • Brownie Flash II
    • Contax G2
    • Ensign Selfix 820
    • FED-1 (PE0320)
    • Graflex Crown Graphic
    • Ihagee Exa
    • Leica M6
    • Nikon S2
    • Nikon F
    • Nikon F2
    • Nikon F3
    • Nikon FA
    • Olympus OM-1
    • Olympus OM-2 SPOT
    • Olympus Stylus
    • Pentacon Six
    • Pentax Spotmatic IIa
    • Rollei 35
    • Voigtlander 15mm ver III
    • Yashica C
    • Zeiss Ikon Nettar 515/2
  • Learning Composition
    • The Monochrome Diaries
    • Single & Multi Elements
    • Symmetry
    • Keep the Right Strong
    • Framing
    • Color in Composition
    • Deep Dive Bubble Man
    • Photo Assignments
  • Darkroom Lessons
    • Building a Sink
    • Air Ventilation
    • Analyser Pro
    • Development Hints
    • Primer for Film Photography
    • Bulk Loading Film
    • Pushing & Pulling Film
    • Color Development
    • Digital Contact Sheets
    • Stick to One Film Stock?
    • HP5+ Shot at 200 ISO
    • HP5 Shot at 1600 ISO
    • HP5 Shot at 3200 ISO
    • Medium Format
    • Washing Film
    • Split Grade Printing
    • Using Distilled Water in Film Development
    • Darkroom Paper
    • Foma100 EI 400
  • Photography Books & Films
    • Colin O'Brien
    • Lartigue Life in Color
    • Magnum Contact Sheets
    • Top Photography Movies
    • William Eggleston's Guide
    • Helen Levitt
    • Sally Mann Immediate Family
    • Saul Leiter Early B&W
    • Leica 100 yrs
    • Calendar Days of Asaya Hamaya
    • The Decisive Moment
    • Regarding Women
    • Robert Capa in Love and War
  • Single Image Deep Dive
    • Sergio Larrain "A Man After Dark"
    • Colin O'Brien 'Comings & Goings"
    • Erwitt Mother & Child
    • Man Running
    • Samuel Becket
    • Koudelka Wristwatch
    • Dovima with Elephants
Salzburg, Austria

"No place is boring if you've had a good night's sleep and a pocket full of film." - Robert Adams
​
"Tea first, then photography..." - Philip Lee Harvey

From an Article written by Philip Lee Harvey
Ode to the JPG

12/30/2019

1 Comment

 
Picture
I love film. I love the time it takes, the tiny imperfections that always pop up and the end result when properly done. When I shoot digital, I shoot in RAW to give me the most latitude when working on the image in post. So imagine my joy at discovering a new world, albeit a smaller one.

Reading a blog post I encountered a comment that the JPG B&W images created by the Leica M9 were perfect to this one photographer's eye. This is obviously something very subjective, but since I had some free time I wanted to take a look at them myself. Never wanting to settle for the simple, I decided to compare a couple of shots in JPF B&W setting between my M10 and M9 (in reality it is an ME which sold for 1500 USD less than the M9 but was essentially the same camera).

During the test I discovered a few things worth noting. The first is that I loved both renditions of the Leica JPG B&W.  The second is that they bring in a certain imperfection that brings me back to my film memories.

So why the interest in rediscovering JPG potential? I love my M10 but also shoot my ME a great deal.  There are a variety of reasons for this which I won't go into but lets say that I take my ME out a great deal.  The ME has an 18 mp sensor which is plenty for my shooting but has two substantial draw backs.  The first is that the back screen is crap. It was on the M9 as well. It is barely good enough to check composition and not much else. Nothing to be done about that. The second is that it is slow. Recording images in RAW even with a fast card causes a bit of a delay. Shooting in JPG solves the second issue completely allowing me to take out the Leica ME on JPG mode in B&W and avoid time consuming conversions.

There are low light performance issues with the older sensor of the ME but coming from film, grain does not bother me.  JPG have limitations as we are not given all the data to be able to alter much.  Again, coming from film, this is normal for me. I don't like pictorializing my digital or film images.

This is another reason for me to pull out my trusty ME and capture some nice images straight out of camera. They will not be perfect, they will have their small issues but this is something that I love in film, so why not embrace in digital as well. Limitations and overcoming them is part of what pushes our creativity.  

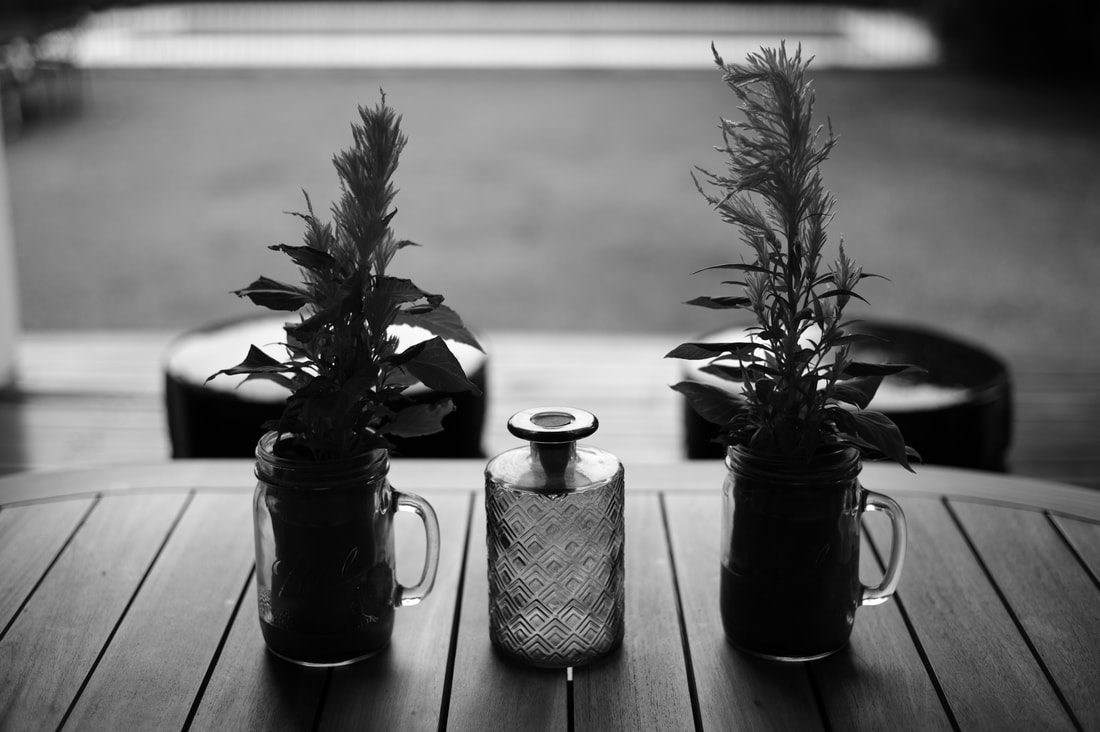
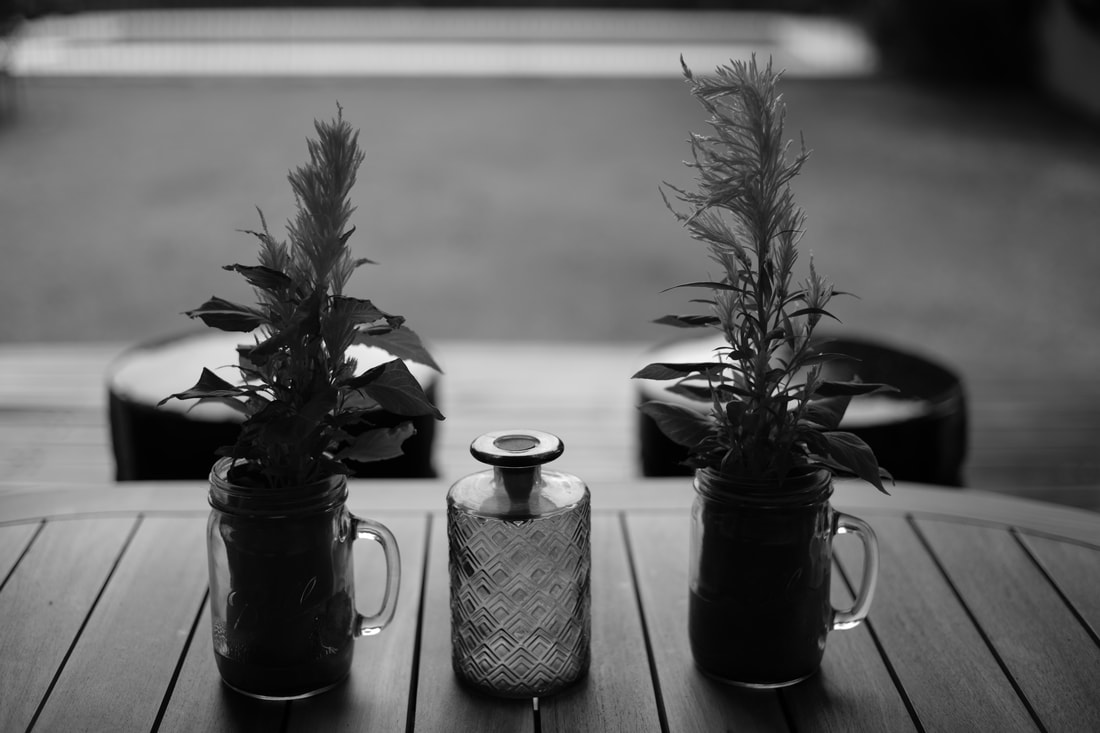
The shot above was taken with a Leica M10 using a Zeiss 50mm f/2 Planar lens (old design with modern construction makes this one of my all time favorite lenses).  This is straight out of the camera with no adjustments made. 

For comparisons, below is the same scene taken with the ME and the same lens. 
Picture
1 Comment

Darkroom Class & Lessons Learned

12/27/2019

0 Comments

 
Picture
Print currently being worked on. 35mm printed on Fiber Based Ilford paper. Split grade used. Still needs some vignetting to get it right.
Like most of todays converts to darkroom printing, I learned most of what I know via YouTube videos and helpful chatrooms.  I then upgraded my education through a friend with vastly more experience than I have.  This helped push my darkroom printing up a notch. 

Last week I decided to pay for a full day class on printing taught by Alejandro Gulminelli who is quickly developing a name for himself in the analog photography world of Buenos Aires.  He has traveled extensively and been taught by some amazing people in the US.  He is very approachable and has an easy manner about him.  I had purchased a enlarger from him a few months ago and decided to return to see about a private class.

Alejandro is a very good photographer and a great guy to learn from. He is patient and walks you through his methods giving you ample opportunity to try different things. I really enjoyed the class so lets jump into it!

It was a full day affair at his business/darkroom.  We started with a quick chat about photography, what I was working on and what I wanted to accomplish that day.  I explained that I knew a bit about darkroom work but wanted to see another person's workflow to see how they did it.

I selected a medium format negative (I took several sheets to pick from) and we started working.  Below are a few things that I learned and an overall take away from the class.  

Notes:

1. Alejandro has a very efficient workflow. Paper is expensive in Argentina (roughly twice that of the US) which has pushed him to be careful with waste. I will explain one method I picked up from him below.

2. Alejandro is methodical especially when it comes to bath times and temperature. Development is 2 minutes with Stop baths being about 30 seconds and development being another 2 minutes.  

3. Alejandro has a very good eye for composition so this part of the print process is second nature to him. I took a bit of time to understand why he would compose things a certain way and was very pleased with his selections. This is more intuitive for him and was fun to watch.

4. Alejandro spends a great deal of time nailing the whites on his images. Once the white has the least amount of detail he nails this down before moving to getting his blacks. His blacks he seemed a little less concerned about, ensuring a true black somewhere on the image and running with it.

5. Alejandro has had a great deal of equipment built for him. One item of note is a steel stand to put the wet prints up on in order to squeegee them dry and study them.  It had some LED lights up top to make it easier to see and a collection tray below for the water.

6. Alejandro will try everything else before moving to dodging and burning. He believes it is hard to get a proper dodge or burn without telltale signs of it being done.

7. Alejandro builds his own frames and even installs lighting in them.  

Overall:

My main lessons learned from Alejandro is one of efficient paper use and careful time management. I used to use half a sheet to do my filter tests at 0 and at 5.  This would kill one entire sheet of paper giving me on bright white and a true black. But it did not show me what they looked like together.

Alejandro taught me to take a smaller strip and get the whites right. So lets say we selected a Grade 2 filter at 10 seconds. He then exposes the next strip for the full 10 seconds before applying the Grade 5 filter and working on the true blacks. This saves time and paper.

I am now timing the amount of time my print sits in the developer, stop and fixer. This coupled with a monitoring of the temperature of the baths (I give myself 20-22 degrees C as a range) will give me more consistent results.

You can see Alejandro's Instagram feed here.

@alejandro.gulminelli

0 Comments

Three Photo Darkroom Work

12/15/2019

0 Comments

 
Picture
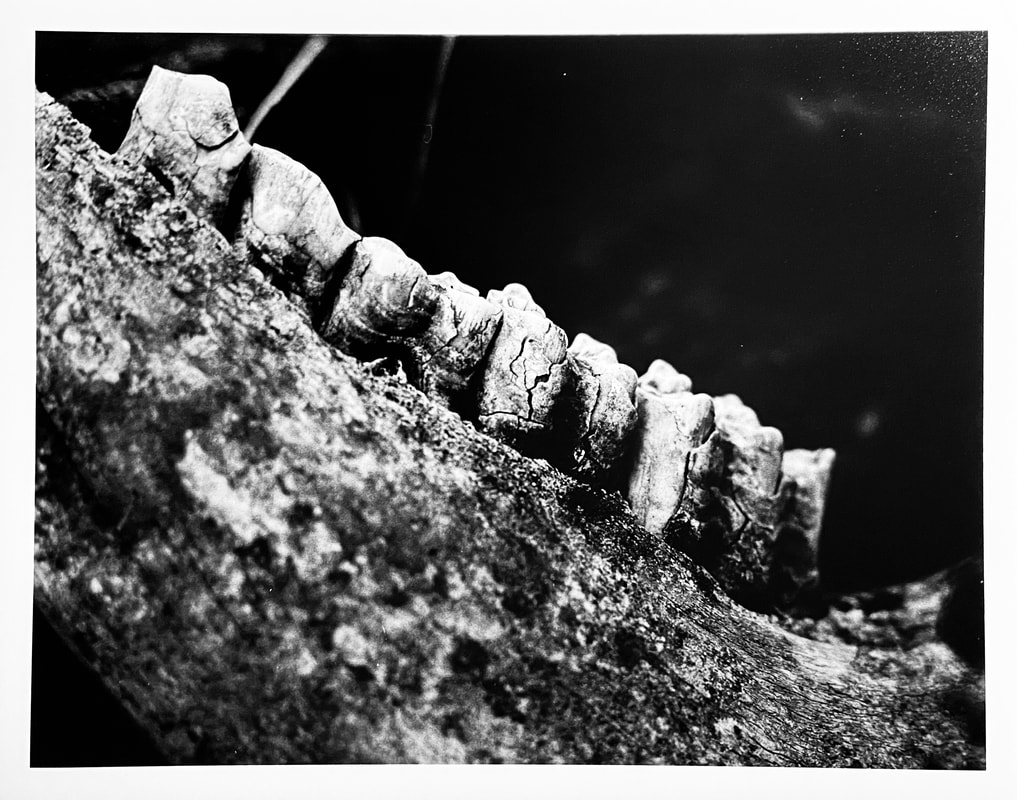
It was a rainy weekend, so I dived into my darkroom to have some fun.  Saturday I developed a roll of 120 and 35mm film that I had taken a few months ago.  The 120 was shot with the Mamiya 220 Pro and the 35mm taken by a Nikon F2.  For the darkroom worked, I selected three 120 shots that I liked.  

The one above is a shot of a jawbone (cow or horse).  I loved the cracked enamel and took advantage of the Mamiya 220 close up function.  I am amazed with the lenses on the 220.  It provides amazing detail and the contrast makes all the shots have a three dimensional look.  I have found that a Pearl Semi-Gloss paper really brings it out nicely.

For the darkroom I opted to use the deep dynamic range that was captured. The teeth and bone were bright white (not blown out but just under).  This allowed me to overexpose the negative dropping the background into a deep black.  There was no need for filters as the contrast with this lens is sufficient for almost any image.  This is in an 8x10 image.
Picture
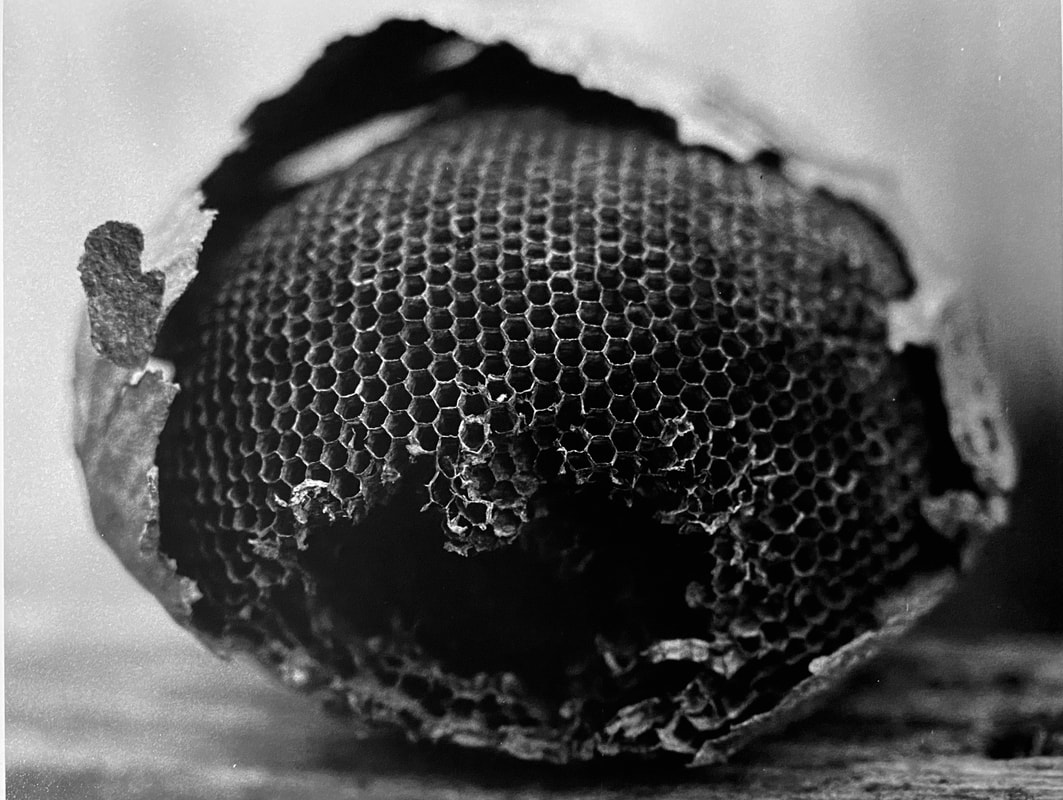
The second was shot on the same paper and is also an 8x10 image.  This is an empty wasp hive that we found around the ranch.  It was rather large (about the size of a baseball) and the honeycomb structure was very appealing.  Again there was sufficient contrast to avoid using the filters.  
Picture
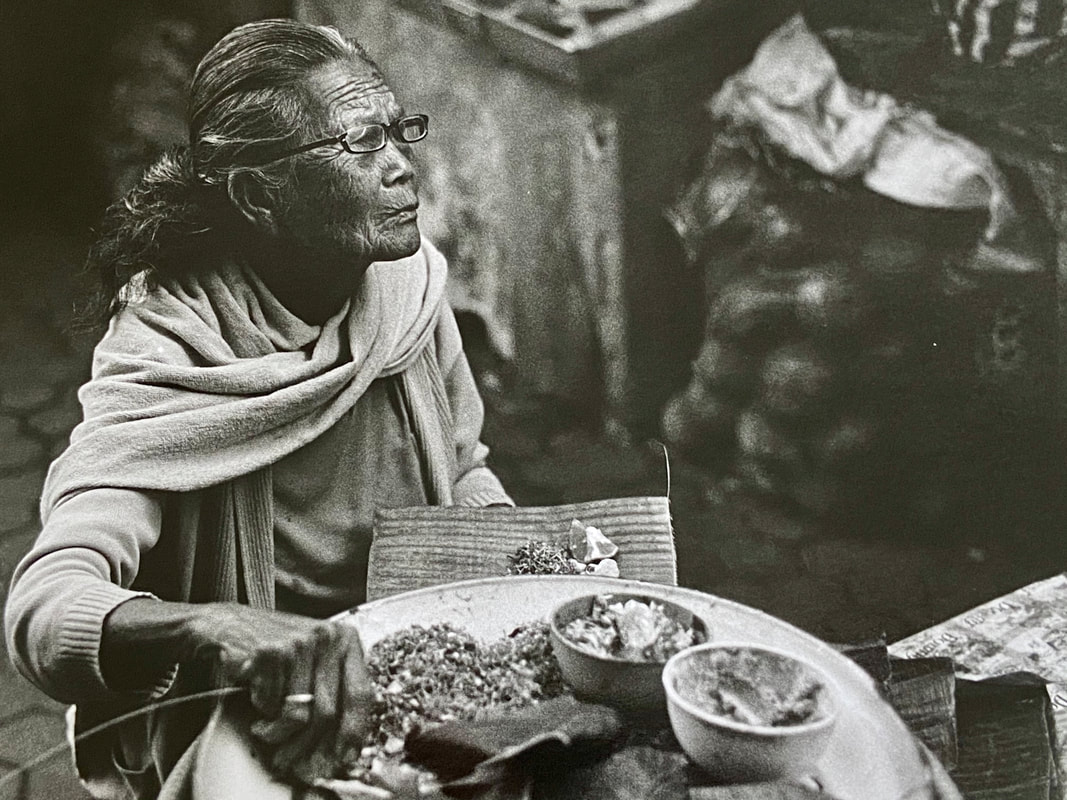
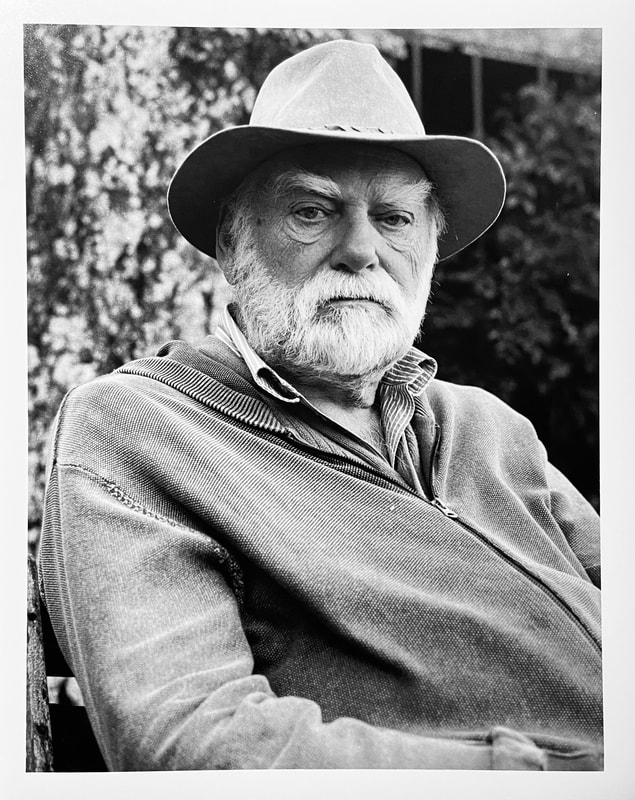
The third shot is my favorite.  It is a portrait of my father sitting at his ranch. He has this calm serenity in this image but behind those eyes is a highly intelligent man who never stops thinking and solving problems. I am happy with the portrait because it captured a wonderful afternoon and really carries his personality through.  

Again no need for filters.  I did burn his sweater a bit as well as his hat to bring out a bit more detail.  

​
0 Comments

    Author

    Patrick...confirmed film & digital photography addict.

    Archives

    March 2023
    January 2023
    March 2022
    January 2022
    December 2021
    November 2021
    October 2020
    August 2020
    June 2020
    May 2020
    April 2020
    December 2019
    November 2019
    October 2019
    September 2019
    August 2019
    June 2019
    May 2019
    April 2019
    March 2019
    October 2018
    September 2018
    August 2018
    July 2018
    June 2018
    May 2018
    April 2018
    March 2018
    February 2018
    January 2018
    December 2017
    November 2017
    October 2017
    September 2017
    August 2017
    July 2017
    June 2017
    May 2017
    April 2017
    March 2017
    February 2017
    January 2017
    December 2016
    November 2016
    October 2016
    September 2016
    August 2016

    Categories

    All

    RSS Feed

Powered by Create your own unique website with customizable templates.
Photos used under Creative Commons from left-hand, Ant Jackson, Skley, mikecogh, Helen.Yang, TheeErin, Dean Hochman, CJS*64, DaveR1988, FootMassagez, Loco Steve, dmytrok, Christiaan Colen
  • Home
  • About
  • Blog
  • Vintage Cameras
    • Argus 75
    • Brownie Flash II
    • Contax G2
    • Ensign Selfix 820
    • FED-1 (PE0320)
    • Graflex Crown Graphic
    • Ihagee Exa
    • Leica M6
    • Nikon S2
    • Nikon F
    • Nikon F2
    • Nikon F3
    • Nikon FA
    • Olympus OM-1
    • Olympus OM-2 SPOT
    • Olympus Stylus
    • Pentacon Six
    • Pentax Spotmatic IIa
    • Rollei 35
    • Voigtlander 15mm ver III
    • Yashica C
    • Zeiss Ikon Nettar 515/2
  • Learning Composition
    • The Monochrome Diaries
    • Single & Multi Elements
    • Symmetry
    • Keep the Right Strong
    • Framing
    • Color in Composition
    • Deep Dive Bubble Man
    • Photo Assignments
  • Darkroom Lessons
    • Building a Sink
    • Air Ventilation
    • Analyser Pro
    • Development Hints
    • Primer for Film Photography
    • Bulk Loading Film
    • Pushing & Pulling Film
    • Color Development
    • Digital Contact Sheets
    • Stick to One Film Stock?
    • HP5+ Shot at 200 ISO
    • HP5 Shot at 1600 ISO
    • HP5 Shot at 3200 ISO
    • Medium Format
    • Washing Film
    • Split Grade Printing
    • Using Distilled Water in Film Development
    • Darkroom Paper
    • Foma100 EI 400
  • Photography Books & Films
    • Colin O'Brien
    • Lartigue Life in Color
    • Magnum Contact Sheets
    • Top Photography Movies
    • William Eggleston's Guide
    • Helen Levitt
    • Sally Mann Immediate Family
    • Saul Leiter Early B&W
    • Leica 100 yrs
    • Calendar Days of Asaya Hamaya
    • The Decisive Moment
    • Regarding Women
    • Robert Capa in Love and War
  • Single Image Deep Dive
    • Sergio Larrain "A Man After Dark"
    • Colin O'Brien 'Comings & Goings"
    • Erwitt Mother & Child
    • Man Running
    • Samuel Becket
    • Koudelka Wristwatch
    • Dovima with Elephants