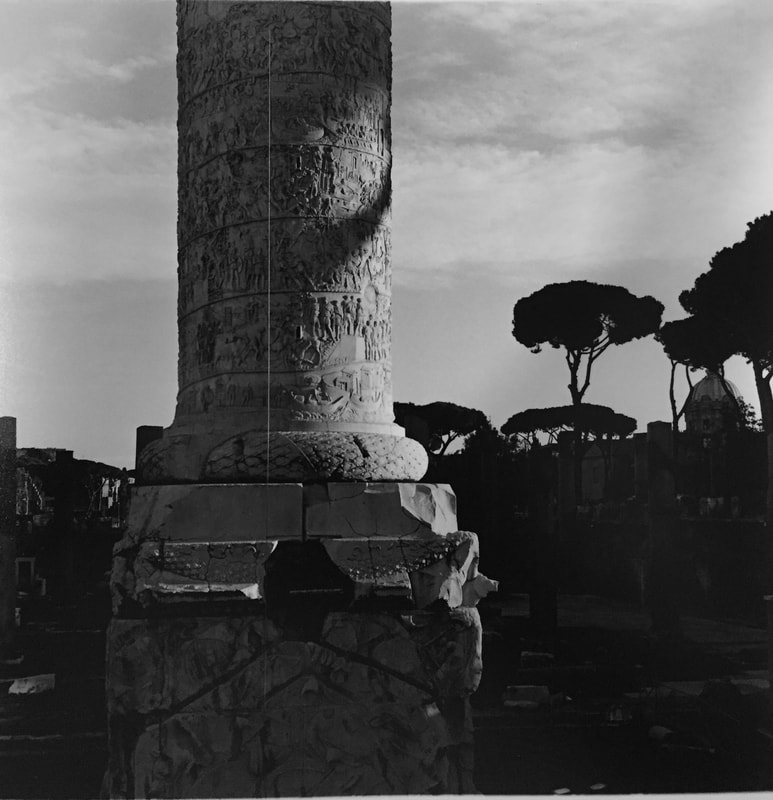
Print without filter. I wanted cloud detail but had trees that lost detail. Dodging and burning would have been impossible with all those trees.
Ahhh, the magic of split grade printing! You will hear many "expert" photographers tell you that you are not really printing unless you are split grade printing! Some will go so far as to tell you that you are only split grade printing if you are burning in with a different grade than the base. All of that is a load of nonsense but what is indeed true is that split grade printing can allow you to make prints that would be too damn hard any other way.
So here is the good news, it is very easy to do. Here is the bad news, everyone has their own way to do it so if you look it up on YouTube you will see several different ways to do it. I will explain how I do it and will give you the link to the YouTube lesson that taught me. I have worked to keep my system simple. Let me walk you through it.
The image above was the first attempt after my test strip. It has no filters and I have the sky detail I wanted but lost all detail in the blacks. Simple solution would normally be to dodge and burn but the shape of the trees would have made it very difficult. So I pulled out filter 0 and added a quarter of my base time and below is the image.
So here is the good news, it is very easy to do. Here is the bad news, everyone has their own way to do it so if you look it up on YouTube you will see several different ways to do it. I will explain how I do it and will give you the link to the YouTube lesson that taught me. I have worked to keep my system simple. Let me walk you through it.
- I make a test strip. See, nice and easy. I do not use a filter for this and use the bare bulb.
- I look closely at the image to determine the right exposure time. Once I do I make a test print.
- I look at the test print to see if it is laid out properly, the image is really in focus and note the dark and light areas of the photo. I then begin to determine how I want it to look and how to make it look that way.
- If possible, I make the print with some minor dodging and burning and call it a day. But sometimes there is just too much deep black or the middle tones seem to blend together too much. This tells me I need to do some split grade printing.
- The lower number you use the less contrast you will have. Essentially your blacks won't be as punchy, which means you keep more detail there. The problem is that it will soften the entire image. All blacks will be toned down a bit. This is where the higher numbers come in. They add contrast to the scene.
- So I usually only use two filters, the 0 and the 5. So I start with the 0 and add about ¼ of time to it. So if my unfiltered image was at 20 seconds, I will add another 5 seconds or so. So I begin with 25 with 0 filter. I then switch to a 5 filter and apply it to give it some contrast back. I do this while protecting (dodging) the areas I want to keep the lower contrast.
- It will take me 3-4 tests to nail in the exposure mix I want.
The image above was the first attempt after my test strip. It has no filters and I have the sky detail I wanted but lost all detail in the blacks. Simple solution would normally be to dodge and burn but the shape of the trees would have made it very difficult. So I pulled out filter 0 and added a quarter of my base time and below is the image.
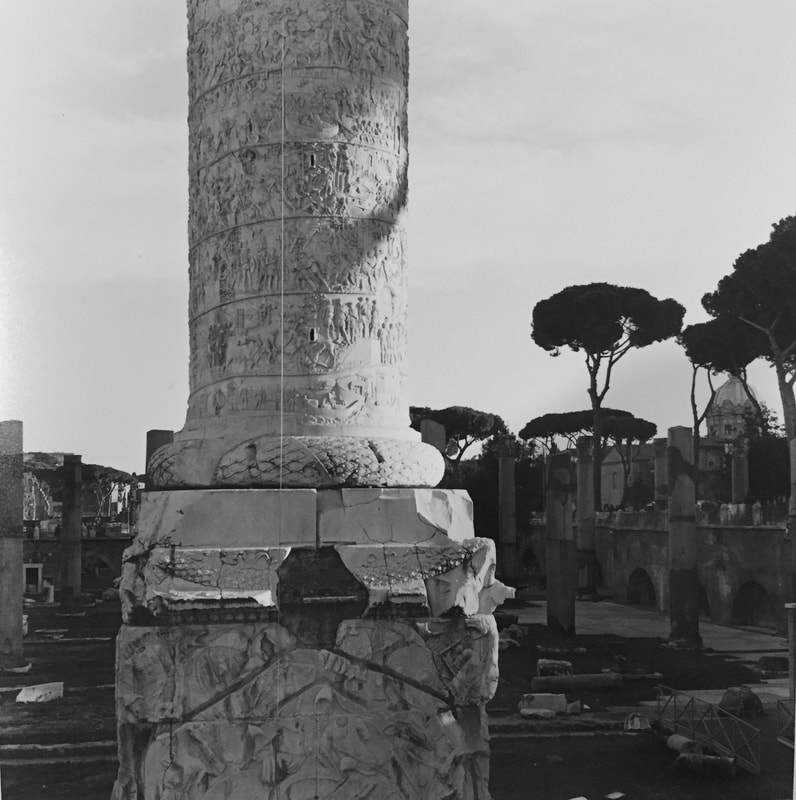
This image is with a 0 filter. You can see I have more detail in the trees now but the sky and column is soft.
With the 0 filter I was able to show the detail of the blacks but even after adding more time I did not have the contrast detail on the column or the sky. The negative captured all the detail, the shot was carefully composed so I really wanted it corrected. So I needed to add a bit of filter 5.
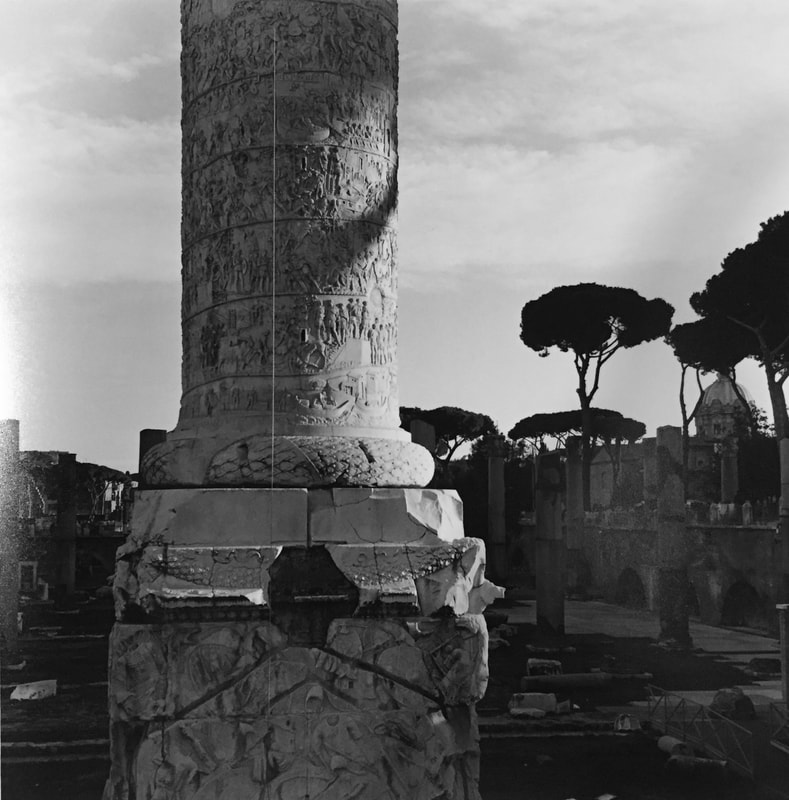
Here is the final print. Now I have detail in the trees and I have texture in the sky and the column jumps a bit. The photo of the print is not very good but suffice to say that two filters saved me a dodging & burning nightmare!
And above is the result of that work. The image is poor quality as the print looks better on all three. But again I have detail in the blacks but have better sky texture and the column is contrasty.
There are times that an image will become a little complex. Let me walk you through the notes of my last print.
Below is the final image result of the above printing process.
I shared the video of how to shoot Split Grade Printing HERE.
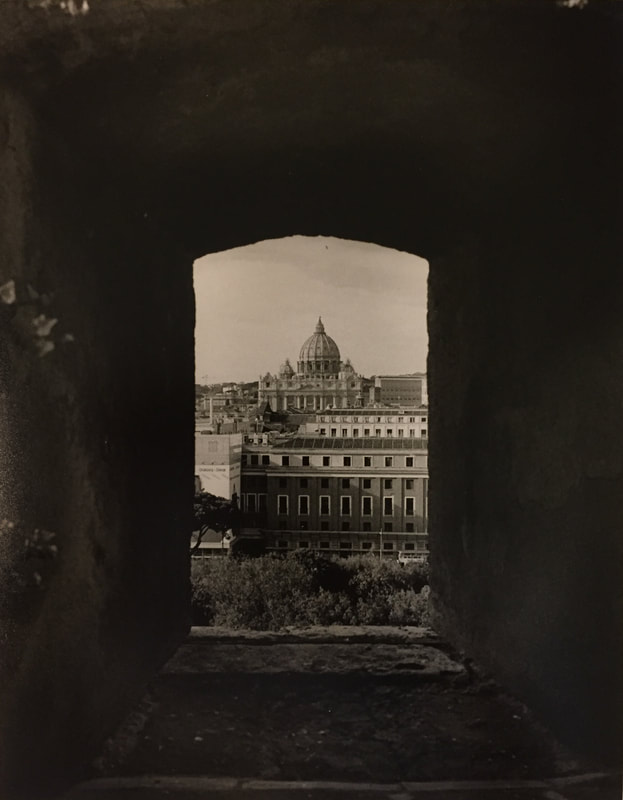
There are times that an image will become a little complex. Let me walk you through the notes of my last print.
- 15 seconds of 0 entire image
- 5 seconds at 0 but dodging top of window frame
- 50 seconds at 5 dodging surrounding window
- 10 seconds no filter just on edges for vignette
Below is the final image result of the above printing process.
I shared the video of how to shoot Split Grade Printing HERE.