Most of the things I purchase for my darkroom is as old as I am. Sometimes a great deal older. The problem with having a hobby out of the main stream is that there are few companies investing in its development. Fortunately there still are some companies that are investing in film photography and the darkroom, more everyday in fact. One of those companies is RH Designs out of the UK.
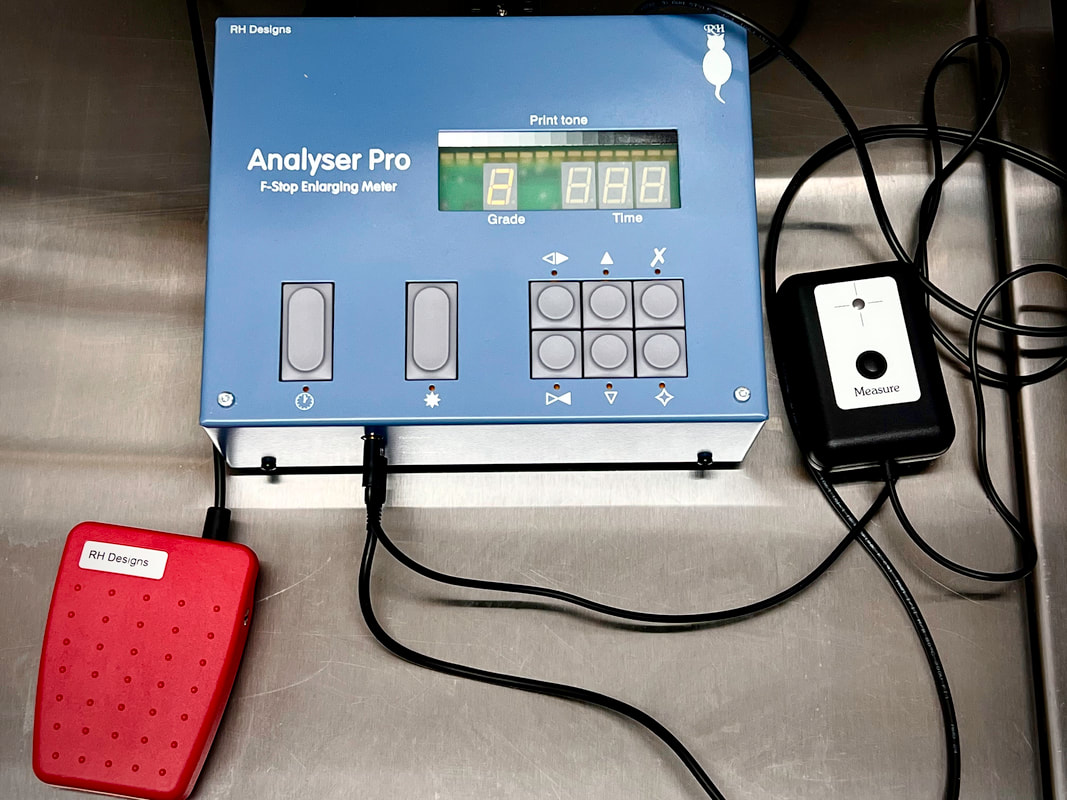
They have built a modern darkroom F-stop exposure meter-timer and sell it in both 220 volts or 110 volts versions. This is not a cheap investment however it is supposed to save you headache, heartache and a bit of money. Here is my review of this little bit of kit.
The What:
It is a F-stop exposure meter. When you take a picture you think in terms of F-stops (or you can if you like). But when we move to the darkroom we switch and start thinking in terms of time. Think about it....
We load a piece of darkroom paper onto the enlarger and take a test strip to understand the ballpark of the image that we are after. Once we get an idea of the time needed to get us into the ballpark we make a second print of the entire image to see all the bits that the test strip left off. We then study this print and plan our dodge and burn plan and then make the print.
If we are using multigrade paper, we then look at the test strip time and decide the level of contract we want to start testing with that filter in place.
The goal is to get as quick as we can to a ballpark time of exposure so we can look at the fine details of what we want to print. This takes time, paper and can at time frustrate us to no end.
What if, we stopped thinking in terms of time and started thinking about stops? So you make a print, think it is to light so you want to increase the exposure...by how much? You can use trial and error, or if you are working in stops of light, you can say that you want to increase it half a stop. You dial in the correction and are done.
Now it is easy to think in terms of stops of light however it is difficult to associate this with time. You see, the amount of exposure exposed to a constant light source is not linear. Each paper has its own build up and fall off. So adding five seconds is not the half of adding 10 seconds. It might be close enough...or it might not.
This device, once calibrated to your paper, does that thinking for you. So all you have to do is take a reading in the bright and dark areas of your negative and the Analyser Pro does the thinking for you. So then we can increase half a stop of light and it will adjust the time accordingly.
The Why:
By taking a spot reading in the brightest part of your photo and one at the darkest (and a few in between if you like) you can then place these two points at the extreme of your exposure and everything should fall in between those points. Getting you very quickly to a working print without a single test strip! It will calculate changes you want to make in filter number, and it allows you to move these exposure extremes anywhere you want.
So does it work? Like a CHAMP!! Yes you do need to calibrate your paper, this takes me about one hour and NO I do not do it for every box of paper. I use Ilford FB paper with a classic finish and as long as I use that same paper I have not had to recalibrate it (four different boxes have been dead on accurate).
I used to need a minimum of four sheets and a bit to get to a print. The bit is the test strip. The first sheet is what I call my "border control" this is where I look at the entire print and see if the test strip was taken at a good spot. I also look to see if there are any elements of the picture that I missed on the negative. If this test is passed, I then consider the contrast I want and select the filters I will use. I take a second sheet at the right contrast filters and check again how this is looking. Now I can start planning my dodge and burn plan. Once made I give it a go which is the third sheet. Now I examine this to decide if this print is working and provided all goes well I can do my final print.
Since getting the Analyser I have skipped the test strip, I still do the "boarder patrol" print and then move directly to my doge and burn plan. But here is the thing....I have to do much less dodging and burning because this little box really gets my exposure right. So I have to correct issues in camera but I am not adding error at the enlarger!
The Good:
Oh, my where to start? It is built perfectly. It is heavy, solid in construction with an interface that once you understand it is very simple to use. It is relatively small, taking the same amount of real estate as my conventional timers. It works without flaws and since using it (having made around 150 prints) I have only seen it confused on a single print from a negative that was not well captured.
I spend less time per print. Now this is a hobby so I am not worried about the use of time, however I am less frustrated with print sessions not working. Now they always seem to work. I also use much less chemical and paper. I get closer to my final image with my first print so I am going right to fine tuning rather than messing around to find the ballpark!
The Bad:
Yes you need to calibrate for your paper. Not an issue if you only use one or two paper types but if you like to play around with 5 or more types of paper, then the calibration may get a bit heavy. No shortcut here. If your calibration is on, you will be making great prints in no time. But it will take about one hour to calibrate the paper to a single enlarger....use more than one enlarger...more calibrations!
I used to use two different enlargers and stopped because of this reason. Since I only have my Durst 1200 calibrated then I use this beast of an enlarger even when doing 35mm enlargements.
Can you do dual filter printing? Not in a straightforward manner. I used to use split grade filter all the time but have not had the need after getting this. Most of my split grade printing was to overcome incorrect exposures in the darkroom. Once you have this set, one filter application is enough. I have gone back and reprinted several images and I am happier with the ones printed using the Analyser.
The Ugly:
Only thing is the price. It is not cheap...running you around 430 GBP. Now with the fall of the Pound this is a bit cheaper if you are buying in USD but it is not cheap. It is the second most expensive thing in my darkroom after my enlarger but it is worth it. I have begun enjoying my print sessions so much more and I am wasting less paper.
Overall:
This is a must buy in my book. Nothing else on the market works as well, It is well built and once you get the hang of it, very easy to use. The display is a bit hard to see in the light but it is meant to be seen in the dark and it is easy to see and use. I wish I had known about it before but I highly recommend this device.
I also bought the heavy duty foot switch which is wonderful however I use it on the table for my hand as I do no like tripping over things in the dark.
I paid for my Analyser in full and have no commercial relationship with RH Designs. Yes this thing is expensive but it became my best friend in the darkroom....and can you really put a price on friendship?
